

Adding Google Maps to your website is pretty much standard nowadays, not only is it showing the information about your company’s location but it also forms a part of your website’s design.
The Standard Google Maps style is great, it can almost match to any website design. But you can go deeper, and style your Google Maps to make it integrate seamlessly wt your site’s colour scheme. For example, let’s say you have a black and white only design on your website. Then, you need to do a bit more work.
The first thing to do is embed your custom Google Maps to your website, if you don’t know how to do it, feel free to read my previous article about ‘How to Add Multiple Google Maps Markers’, it’s pretty straightforward and easy to follow.
Google offers the tools to style up your Google Maps colour. As you can see here, it has comprehensive style options.

Having full control of the options is great, but for me, too many options is not always a good thing! Yeah, you are not the only one that wants a simple way to style up your custom Google Maps. Fortunately, there is another tool that contains a bunch of Google Maps style templates ready to use as you can see here. Browse their maps style directory until you find one you like the most, and that matches to your website’s look.
Have you found your template that you like yet? OK, let’s continue, we will bring the example from my previous article about adding Google Maps markers and style it. Here is the code of our custom maps:
(function($) {
    // generate map
    function new_map($el) {
        // var
        var $markers = $el.find('.marker');
        // vars
        var args = {
            zoom: 16,
            center: new google.maps.LatLng(0, 0),
            mapTypeId: google.maps.MapTypeId.ROADMAP
        };
        // create map
        var map = new google.maps.Map($el[0], args);
        // add a markers reference
        map.markers = [];
        // add markers
        $markers.each(function() {
            add_marker($(this), map);
        });
        // center map
        center_map(map);
        return map;
    }
    // add the marker
    function add_marker($marker, map) {
        // var
        var latlng = new google.maps.LatLng($marker.attr('data-lat'), $marker.attr('data-lng'));
        // create marker
        var marker = new google.maps.Marker({
            position: latlng,
            map: map
        });
        // add to array
        map.markers.push(marker);
        // if marker contains HTML, add it to an infoWindow
        if ($marker.html()) {
            // create info window
            var infowindow = new google.maps.InfoWindow({
                content: $marker.html()
            });
            // show info window when marker is clicked
            google.maps.event.addListener(marker, 'click', function() {
                infowindow.open(map, marker);
            });
        }
    }
    // center the map
    function center_map(map) {
        // vars
        var bounds = new google.maps.LatLngBounds();
        // loop through all markers and create bounds
        $.each(map.markers, function(i, marker) {
            var latlng = new google.maps.LatLng(marker.position.lat(), marker.position.lng());
            bounds.extend(latlng);
        });
        // only 1 marker?
        if (map.markers.length == 1) {
            // set center of map
            map.setCenter(bounds.getCenter());
            map.setZoom(16);
        } else {
            // fit to bounds
            map.fitBounds(bounds);
        }
    }
    // embed it
    var map = null;
    $(document).ready(function() {
        $('.acf-map').each(function() {
            // create map
            map = new_map($(this));
        });
    });
})(jQuery);
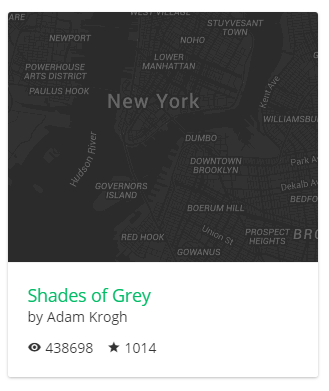
I chose the Shade of Grey template from Snazzy site which I think it will match with the black and white color scheme:
Now all you need to do is edit this line of code to insert the style:
var args = {
    zoom: 16,
    center: new google.maps.LatLng(0, 0),
    mapTypeId: google.maps.MapTypeId.ROADMAP
};
Popping it in:
var args = {
    zoom: 16,
    center: new google.maps.LatLng(0, 0),
    mapTypeId: google.maps.MapTypeId.ROADMAP,
    styles: [{"featureType":"all","elementType":"labels.text.fill","stylers":[{"saturation":36},{"color":"#000000"},{"lightness":40}]},{"featureType":"all","elementType":"labels.text.stroke","stylers":[{"visibility":"on"},{"color":"#000000"},{"lightness":16}]},{"featureType":"all","elementType":"labels.icon","stylers":[{"visibility":"off"}]},{"featureType":"administrative","elementType":"geometry.fill","stylers":[{"color":"#000000"},{"lightness":20}]},{"featureType":"administrative","elementType":"geometry.stroke","stylers":[{"color":"#000000"},{"lightness":17},{"weight":1.2}]},{"featureType":"landscape","elementType":"geometry","stylers":[{"color":"#000000"},{"lightness":20}]},{"featureType":"poi","elementType":"geometry","stylers":[{"color":"#000000"},{"lightness":21}]},{"featureType":"road.highway","elementType":"geometry.fill","stylers":[{"color":"#000000"},{"lightness":17}]},{"featureType":"road.highway","elementType":"geometry.stroke","stylers":[{"color":"#000000"},{"lightness":29},{"weight":0.2}]},{"featureType":"road.arterial","elementType":"geometry","stylers":[{"color":"#000000"},{"lightness":18}]},{"featureType":"road.local","elementType":"geometry","stylers":[{"color":"#000000"},{"lightness":16}]},{"featureType":"transit","elementType":"geometry","stylers":[{"color":"#000000"},{"lightness":19}]},{"featureType":"water","elementType":"geometry","stylers":[{"color":"#000000"},{"lightness":17}]}]
};
Tadaa! You’ve successfully styled your custom Google Maps. So what’s next? You can also style your maps based on the user’s timezone, let’s say to show different colour’s for day and night, or maybe based on their location. Creativity is your only limit! Go ahead. If you find it hard to customize the appearance of your Google Maps, or need any ideas for how to interact with your visitors more using Google Maps, we’re here to help. Get in touch for a chat!